Finding the perfect snack that balances convenience, nutrition, and taste feels like a constant battle for fitness enthusiasts and busy parents alike. Most store-bought protein bars contain hidden preservatives and artificial sweeteners that derail your health goals. However, these 3-ingredient Banana Protein Balls offer a clean, whole-food alternative that you can whip up in less than five minutes.
This guide explores everything you need to know about making, storing, and customizing these powerful little bites to fuel your active lifestyle.
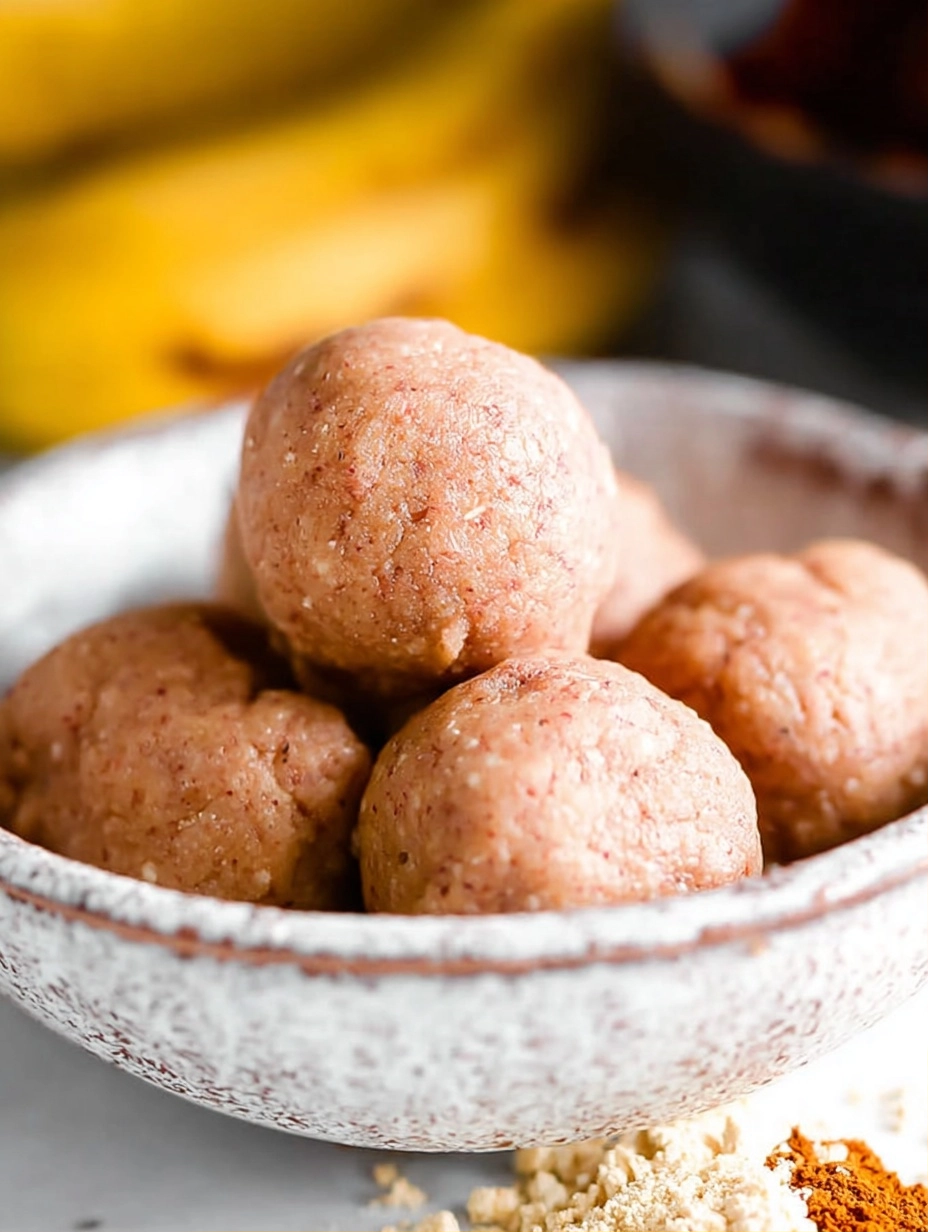
Why Banana Protein Balls Are the Perfect Post-Workout Fuel
When you finish a workout, your muscles crave two main things: fast-acting carbohydrates to replenish glycogen and high-quality protein to repair muscle fibers. These banana protein balls deliver both in a portable package. The mashed banana provides natural sugars and potassium, which helps prevent muscle cramps.
Meanwhile, the protein powder ensures your body has the necessary amino acids for recovery. Unlike heavy meals, these bites digest quickly, making them an ideal choice for a pre-workout energy boost or a post-gym recovery snack.
Breaking Down the Simple Ingredient List
One of the best things about this recipe is its simplicity. You likely already have these three items in your pantry. Let’s look at why each ingredient plays a vital role.
1. Mashed Banana
Bananas act as the primary binding agent in this recipe. They provide moisture and a natural sweetness that eliminates the need for honey or maple syrup. Select overripe bananas with brown spots for the best flavor, as their sugar content is higher and they mash more easily.
If you are watching your sugar intake or do not like bananas, unsweetened applesauce works as a seamless 1:1 substitute.
2. Natural Nut Butter
Peanut butter or almond butter adds healthy fats and a creamy texture. These fats slow down the digestion of the carbohydrates, providing a steady stream of energy rather than a quick spike and crash. Ensure you use a natural variety without added palm oil or sugar to keep the nutritional profile as clean as possible.
3. Premium Protein Powder
The type of protein powder you choose significantly impacts the final texture. Vanilla whey protein is a popular choice because it complements the banana flavor beautifully. However, plant-based proteins such as pea or soy protein also work exceptionally well.
Note that vegan protein powders tend to absorb more liquid, so you might need a touch more banana if your dough feels overly crumbly.
Nutritional Analysis Per Serving
This recipe makes six servings, providing a balanced macro profile for anyone tracking their intake.
| Nutrient | Amount per Serving |
|---|---|
| Calories | 77.1 kcal |
| Protein | 8.3 g |
| Total Fat | 3.3 g |
| Carbohydrates | 5.1 g |
| Dietary Fiber | 0.6 g |
| Sugars | 2.7 g |
| Sodium | 13.5 mg |
How to Make Banana Protein Balls: A Step-by-Step Walkthrough
Follow these simple steps to ensure your protein balls turn out perfectly every time.
Step 1: Mashing and Mixing
Start by mashing your banana until it reaches a smooth, liquid-like consistency. In a large mixing bowl, add your choice of nut butter and the protein powder. Use a sturdy spatula to begin folding the dry powder into the wet ingredients. It may look like there is too much powder at first, but keep stirring.
Step 2: Kneading the Dough
Once the mixture becomes too thick for a spatula, switch to your hands. Knead the dough just like you would with bread. This helps distribute the oils from the nut butter evenly. If the dough feels too sticky, add an extra teaspoon of protein powder. If it is too dry, add a small spoonful of mashed banana.
Step 3: Rolling and Shaping
Scoop out about one tablespoon of dough at a time. Roll the dough between your palms to form a smooth sphere. If you find the mixture sticking to your skin, lightly dust your hands with a bit of oat flour or cocoa powder. This creates a professional finish and makes storage easier.
Step 4: Chilling for Texture
While you can eat these immediately, they taste significantly better after chilling. Place the balls on a tray lined with parchment paper and refrigerate for at least sixty minutes. This allows the protein powder to fully hydrate and the fats to firm up, resulting in a fudge-like texture.
Flavor Variations to Keep Things Interesting
While the base recipe is delicious, you can easily customize these to suit your cravings.
- Chocolate Chip: Fold in a tablespoon of mini dark chocolate chips for a classic pairing.
- Double Chocolate: Use chocolate protein powder and add a teaspoon of cacao powder to the mix.
- Cinnamon Spice: Add half a teaspoon of ground cinnamon and a pinch of nutmeg for a warm, autumnal flavor.
- Coconut Bliss: Roll the finished balls in shredded unsweetened coconut for added texture.
Proper Storage and Meal Prep Tips
These banana protein balls are a meal prepper’s dream. You can easily double or triple the batch to have snacks ready for the entire week. Store them in an airtight container in the refrigerator for up to five days. For longer storage, place them in a freezer-safe bag.
They freeze perfectly for up to three months. When you are ready to eat, just let one sit at room temperature for ten minutes or eat it frozen for a chewy, candy-like treat.
Frequently Asked Questions
Can I use a liquid sweetener instead of banana?
While you can use honey or agave, the banana provides the bulk and texture required for this specific recipe. If you swap it for a liquid sweetener, you will need to add a dry ingredient like oat flour to compensate for the lost volume.
What is the best protein powder for this recipe?
Casein or a whey-casein blend often yields the best ‘dough’ texture. Pure whey can sometimes become a bit sticky, while plant-based proteins can be a bit ‘earthy’. Experiment with your favorite brand to see what you prefer.
Are these suitable for children?
Absolutely! These are a fantastic alternative to sugary snacks. Because they are soft, they are easy for kids to chew, and the high protein content helps keep them full between meals.
Final Thoughts on Homemade Protein Snacks
Making your own snacks puts you in total control of your nutrition. These Banana Protein Balls prove that you do not need a long list of ingredients or hours in the kitchen to support your fitness goals. By combining healthy fats, natural carbohydrates, and high-quality protein, you create a powerhouse snack that tastes like dessert but fuels your body like a meal.
Try making a batch today and experience the difference that fresh, homemade ingredients make in your daily routine.
The Recipe
PrintBanana Protein Balls
A quick, 3-ingredient snack perfect for post-workout recovery or a healthy mid-day energy boost.
- Prep Time: 5 min
- Cook Time: 0 min
- Total Time: 5 min
- Yield: 6 servings 1x
- Category: Snack
- Method: No-Bake
- Cuisine: American
- Diet: Gluten-Free
Ingredients
1/3 cup (80 g) mashed banana
2 tbsp natural peanut butter
1/2 cup (50 g) vanilla protein powder
Instructions
- Combine protein powder, peanut butter, and mashed banana in a large bowl.
- Mix with a fork or spatula until a dough forms, switching to hands if necessary.
- Adjust consistency: add protein powder if too sticky, or banana if too dry.
- Roll into bite-sized balls using your palms.
- Place on a parchment-lined tray and refrigerate for 1 hour to set.
Notes
- Use overripe bananas for the sweetest flavor.
- If the dough sticks to your hands, dust them with a little oat flour.
- Store in an airtight container in the fridge.
Nutrition
- Serving Size: 1 ball
- Calories: 77.1 kcal
- Sugar: 2.7 g
- Sodium: 13.5 mg
- Fat: 3.3 g
- Saturated Fat: 0.6 g
- Unsaturated Fat: 2.1 g
- Trans Fat: 0 g
- Carbohydrates: 5.1 g
- Fiber: 0.6 g
- Protein: 8.3 g
- Cholesterol: 12 mg