Finding the perfect balance between a healthy snack and an indulgent dessert feels like a challenge. However, these No-Bake Peanut Butter Bars bridge that gap effortlessly. You only need a few pantry staples, ten minutes of active preparation time, and a refrigerator to create a treat that rivals any store-bought candy bar. This recipe caters to health-conscious individuals, busy parents, and fitness enthusiasts alike because it focuses on whole-food ingredients without sacrificing flavor.
Because these bars require no oven time, they remain a favorite during hot summer months or those frantic weekday evenings when you crave something sweet but lack the energy for a complex baking project.
Why You Will Love These No-Bake Bars
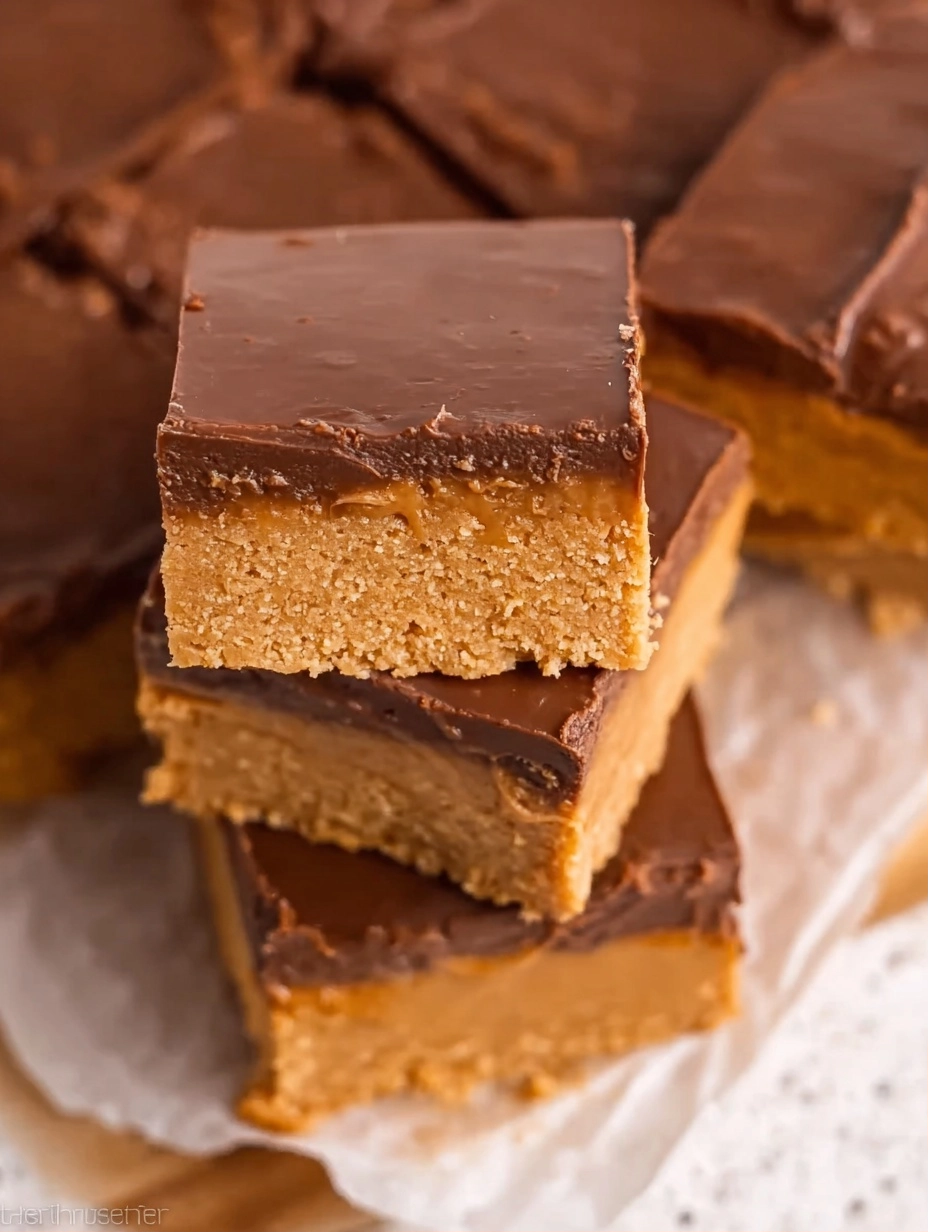
Peanut butter and chocolate represent a timeless duo. These bars highlight that classic combination while keeping the ingredient list clean. Unlike traditional versions that rely on heavy amounts of powdered sugar or butter, these bars use maple syrup for natural sweetness and oat flour for a hearty, fiber-rich base.
Many people prefer this version because it provides sustained energy rather than a quick sugar spike and subsequent crash. Furthermore, the texture stays perfectly fudgy, offering a satisfying chew that pairs beautifully with the crisp, dark chocolate topping.
Nutritional Powerhouse Ingredients
Every ingredient in this recipe serves a purpose. Peanut butter provides healthy monounsaturated fats and a solid hit of plant-based protein. When you choose a high-quality, creamy variety, you ensure the bars remain smooth and decadent. Dark chocolate, the other star of the show, delivers antioxidants and a rich depth that balances the sweetness of the maple syrup.
Using oat flour keeps the recipe gluten-free (provided you use certified oats) and adds a subtle nuttiness that complements the peanuts. If you want to increase the macro-protein content, the addition of a plant-based protein powder transforms these bars into an ideal post-workout recovery snack.
Step-By-Step Preparation Guide
The beauty of this recipe lies in its simplicity. You do not need professional culinary skills to master the art of the no-bake bar. Following these steps ensures a consistent result every time.
Creating the Peanut Butter Base
Start by choosing a large mixing bowl. Combine the creamy peanut butter and maple syrup first. Use a firm spatula to stir them until they emulsify into a glossy, uniform liquid. Once smooth, gradually fold in the oat flour. If you decide to include protein powder, add it at this stage. You might notice the dough texture varies depending on the brand of peanut butter you use.
If the mixture feels too dry or crumbly, incorporate an extra tablespoon of peanut butter. Conversely, if it feels overly sticky, add a sprinkle more of oat flour. You want a dough that holds together when pressed but doesn’t stick excessively to your fingers.
Perfecting the Chocolate Glaze
While the base layer provides the substance, the chocolate coating provides the luxury. Melting dark chocolate chunks with a touch of peanut butter creates a ganache-like finish that remains soft enough to bite through without shattering. Using 30-second intervals in the microwave prevents the chocolate from burning, which can happen quickly if you apply heat for too long.
Stirring between intervals distributes the heat evenly, resulting in a silky-smooth pourable topping.
Customization and Variations
While the standard recipe is excellent, you can adapt these bars to suit your dietary needs or flavor preferences. If you have a peanut allergy, almond butter or sunflower seed butter work as excellent substitutes. For a touch of crunch, fold in a handful of crushed peanuts or cacao nibs into the base dough. Many enthusiasts enjoy a sprinkling of flaky sea salt on top of the chocolate layer while it is still wet; this enhances the sweetness and adds a gourmet touch.
For a lower carbohydrate version, almond flour replaces the oat flour seamlessly, and sugar-free chocolate chips work well for those monitoring their glucose levels.
Storage and Meal Prep Strategy
These No-Bake Peanut Butter Bars serve as an excellent meal prep option. Because they last for up to two weeks in the refrigerator, you can make a large batch on Sunday and enjoy them throughout the work week. To maintain the best texture, store them in an airtight container with pieces of parchment paper between the layers to prevent sticking.
If you want to keep them longer, these bars freeze exceptionally well for up to three months. Simply thaw a bar at room temperature for five minutes before eating for the perfect consistency.
Nutritional Overview
The following table provides the nutritional breakdown per serving based on the standard recipe ingredients. These values make it easy for you to track your intake while enjoying a delicious treat.
| Nutrient | Amount Per Serving |
|---|---|
| Calories | 184.6 kcal |
| Total Fat | 11.9 g |
| Carbohydrates | 17.5 g |
| Protein | 4.7 g |
| Fiber | 2.1 g |
| Sugar | 5.6 g |
| Sodium | 3.9 mg |
Enjoy Your Homemade Healthy Treats
Now that you have the tools and the recipe, it is time to head to the kitchen. These No-Bake Peanut Butter Bars prove that you do not need a long list of fancy ingredients or hours of time to create something truly delicious. They offer a wholesome alternative to processed snacks and provide a boost of energy whenever you need it most.
Share them with friends, pack them in school lunches, or keep them all to yourself for a guilt-free late-night snack. Once you try this simple method, it will likely become a permanent fixture in your recipe rotation.
The Recipe
PrintNo-Bake Peanut Butter Bars
A delicious, healthy, and easy-to-make vegan snack that requires no baking and only 10 minutes of prep.
- Prep Time: 10 min
- Cook Time: 0 min
- Total Time: 10 min
- Yield: 16 servings 1x
- Category: Snack
- Method: No-Bake
- Cuisine: American
- Diet: Vegan
Ingredients
1 cup creamy peanut butter
1/3 cup maple syrup
1 cup oat flour
5 oz dark chocolate chunks
1 tbsp peanut butter (for melting)
Optional: 1/2 cup protein powder
Instructions
- Line a 9×9 inch brownie pan with parchment paper.
- In a large bowl, mix 1 cup peanut butter and maple syrup until smooth.
- Stir in oat flour and optional protein powder until a dough forms.
- Press the dough firmly into the prepared pan using a spatula.
- Melt dark chocolate and 1 tbsp peanut butter in the microwave in 30-second bursts.
- Spread the melted chocolate evenly over the peanut butter base.
- Refrigerate for 1-2 hours until set, then slice into 16 bars.
Notes
- Use certified gluten-free oat flour if necessary.
- Store in the fridge for up to 2 weeks or freeze for up to 3 months.
- Add a pinch of sea salt on top for extra flavor.
Nutrition
- Serving Size: 1 bar
- Calories: 184.6 kcal
- Sugar: 5.6 g
- Sodium: 3.9 mg
- Fat: 11.9 g
- Carbohydrates: 17.5 g
- Fiber: 2.1 g
- Protein: 4.7 g